
Optimized Local AI on Intel Arc B580 with OpenWebUI and Ollama, using Fedora Linux and Podman
In this guide, I will show you how to utilize a combination of Open WebUI and ollama to run inference and fine tuning on an Intel Arc B580 (or older) GPU. We will be using Intel's IPEX-LLM Pytorch Library for optimal performance.

In this guide, I will show you how to utilize a combination of Open WebUI and ollama to run inference and fine tuning on an Intel Arc B580 (or older) GPU. We will be using Intel's IPEX-LLM Pytorch Library for optimal performance.
Once you complete this guide, you will be able to log into a fully featured AI Playground through your Browser and experiment with cutting-edge open source AI Models - all locally and without the privacy nightmare associated with the likes of ChatGPT and Github Copilot.
Prerequisites
Please make sure you fulfill the following requirements to follow along with this guide:
- A dedicated Intel Arc GPU (I tested this on a B580 12GB but it should also work on Alchemist cards)
- At least 40 GB of Disk Space
- Fedora 41 (or another Distribution with at least Kernel 6.12 for the B580 and the required packages available)
Install the following packages:
intel-compute-runtime
intel-igc
intel-level-zero
intel-ocloc
intel-opencl
podman
podman-plugins
A note about Podman vs Docker
While I prefer to use Podman for multiple reasons including security, the command used in this guide also work with Docker in most setups. It is likely you will have to run the commands as a superuser (with sudo). If you do not yet have docker installed I recommend you q start out with Podman.
Create a shared container network:
podman network create ml_sharedThe containers will exchange data via the "ml_shared" bridge network, minimizing exposure.
Serve ollama with performance optimizations from Intel's IPEX-LLM
Intel IPEX-LLM is a Pytorch Library that allows one to run Large Language Models on Intel GPUs. It is optimized for the GPU Architecture in various ways and allows for a multitude of inference techniques.
As part of the open source project, Intel provides an Ubuntu container with all the optimizations that comes bundled with ollama (and llama.cpp, which is what's under ollama's hood).
This container will be our back-end, storing and downloading models, performing the actual inference and talking to the GPU Drivers.
Start it using the following command:
podman run  -itd \
            --device=/dev/dri \
            --name=intel-llm \
            -v models:/root/.ollama/models \
            -e no_proxy=localhost,127.0.0.1 \
            -e OLLAMA_HOST=0.0.0.0 \
            -e DEVICE=Arc \
            -e HOSTNAME=intel-llm \
            -e OLLAMA_NUM_GPU=999 \
            -e ZES_ENABLE_SYSMAN=1 \
            --network ml_shared \
            --restart=always \
            docker.io/intelanalytics/ipex-llm-inference-cpp-xpu:latest \
            sh -c 'mkdir -p /llm/ollama && cd /llm/ollama && init-ollama && exec ./ollama serve'
This command will create and start the Intel IPEX-LLM Container, which will serve ollama.
Run OpenWebUI
Open WebUI is a user interface that allows one to easily manage ollama (or other back-ends) and download as well as change tunables for various large language models. It is mostly focused on user interaction through chatting but can also be extended with audio and image functionality.
In the Setup command, we will tell it about our ollama instance from the last step and Start the Open WebUI container, exposing its web interface at Port 8080:
podman run -d \
           --name=openwebui \
           -v open-webui:/app/backend/data \
           -p 8080:8080 \
           --network ml_shared \
           -e OLLAMA_BASE_URL="http://intel-llm:11434" \
           --restart=always \
           ghcr.io/open-webui/open-webui:main
This command will create and start the Open WebUI container, which will serve a Webinterface to manage ollama and interact with AI Models.
After a few minutes podman ps should show both containers up and running:

Logging into the Web UI and asking your first prompt
Congratulations! You have successfully installed Open WebUI and ollama using IPEX-LLM and Podman.
Open your browser and connect to the Open WebUI web interface at http://localhost:8080 (or click the button below).
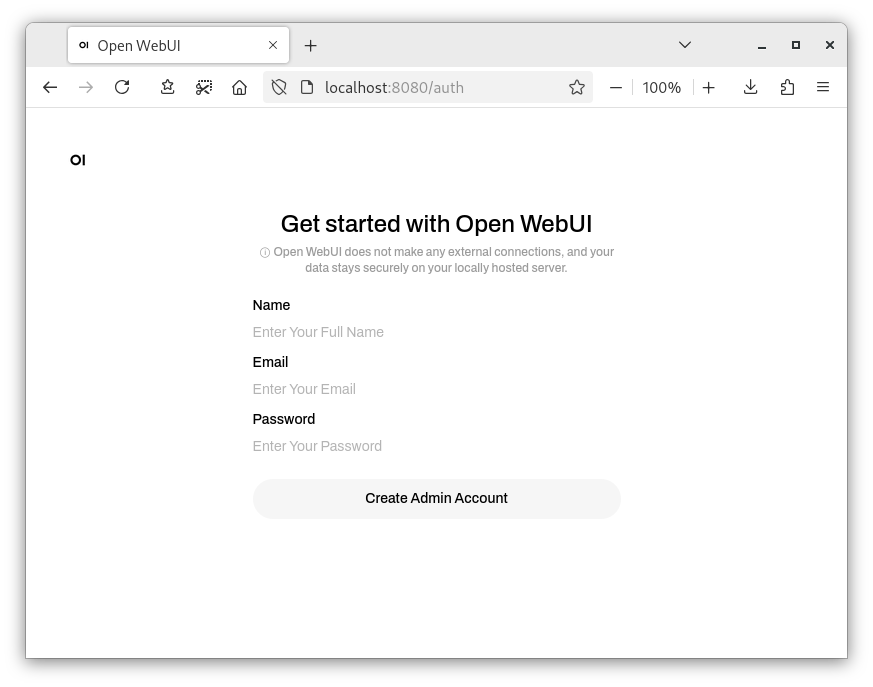
Once you click "Get started", Open WebUI will ask you to set up an Admin Account. If you plan on later exposing Open WebUI to other devices on your local network, this should be a secure password.
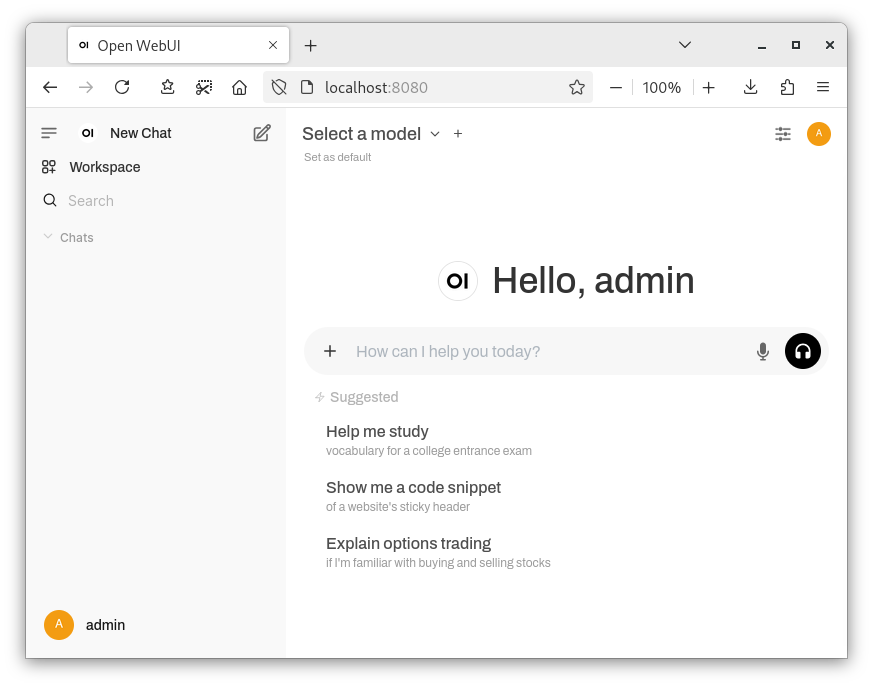
Afterwards, you are greeted by the default chat screen.
Now, all that's left to do is download some models from ollama.
Once you've found a model you like, go back to Open WebUI to enter the model name and size and click "Pull [model] from Ollama.com".

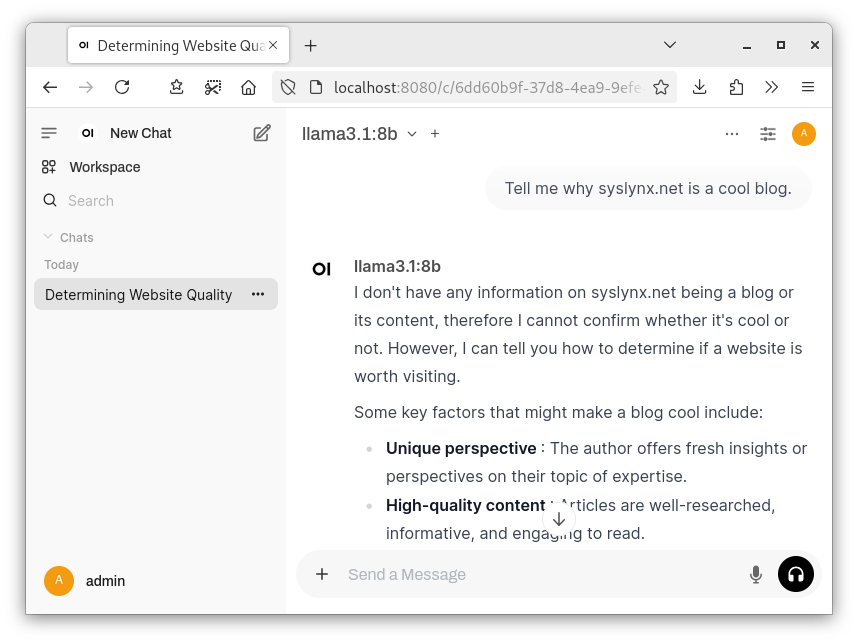
Now all that's left to do is select one of the models you downloaded and ask some questions!
Conclusion
You are now able to chat with your very own personal AI Assistant.
Thank you for reading by blog post. I hope you found it useful. If so, consider subscribing or leaving a comment!
For further information, you can refer to the projects used in this guide:

Comments ()